The Flip Lacers were designed for standard low cut shoes. In some cases they will work for athletic shoes. The Flip Lacer may not work on every pair of shoe due the design of the shoe. The first thing to do is look at on the shoe you intend to place the Flip lacer on. If its a standard low cut shoe with 4-7 eyelets on each side of the shoe they should work fine. How ever, if the shoe has laces always to the toes and 8 are more eyelets per side. They may not work. Look at your eyelets. Do your lace slide freely through the eyelets. Some of the shoe designers are going with extremely large laces and instead of metal eyelets they have these tiny little punched holes. If this is the case you can correct this problem 2 ways. One buy smaller diameter laces that will slide freely through the eyelets. Or use a awl (tapered punch) to enlarge the eyelet holes. Regardless for your shoe laces to do the job they were intended to the laces most slide freely through your eyelets. If you really don't like tying your laces, then when you shop for new shoes look closely at this and only buy shoes where the laces slide freely. The Flip pulls your laces tight from both ends of your lace pattern. The ability for your laces to slide freely through the eyelets is important in any case whether you are using Flip Lacers are not.
The following is the lacing sequence of a standard 6 hole shoe.
Go to step one below. You will have a picture with explanation below it in each step.
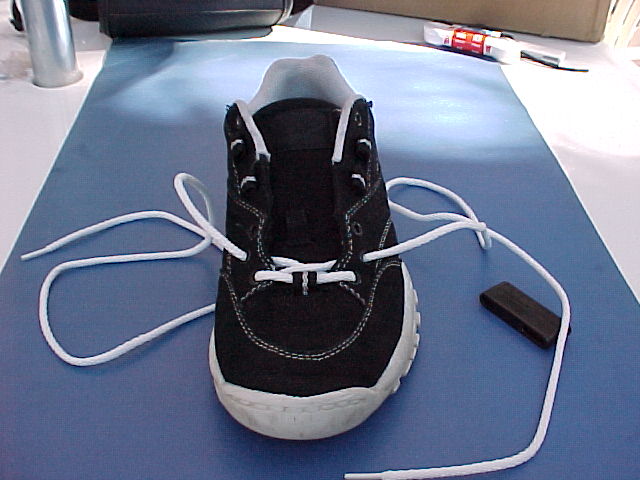
Step 1: Remove your laces and start installing your laces as normal, This example of the sequence of a 6 hole shoe (A 6 hole shoe is a shoe with 6 eyelet holes on one side of shoe). If you were lacing a 7 hole shoe, you would cross lace one additional time before going to step 2. and etc.
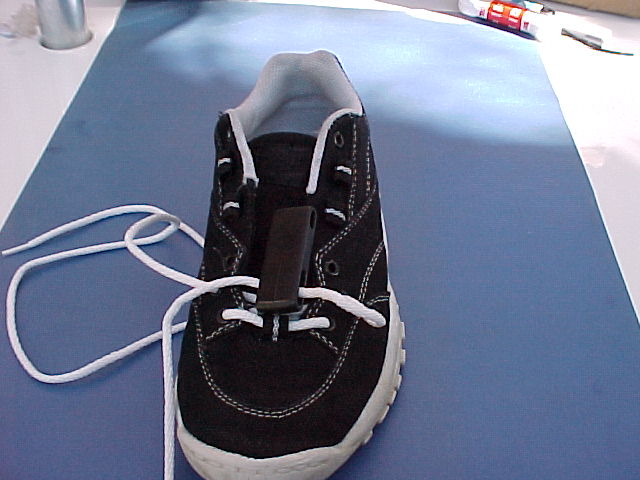
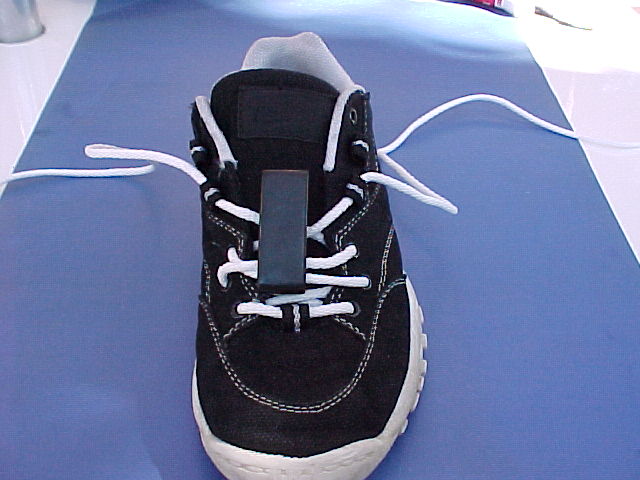
Step 2: Place Flip lacer and lace through elongated hole of Flip Lacer. The elongated hole of Flip Lacer should be towards the toe end of the shoe and the small hole of the Flip Lacer will be towards the top of the shoe. This is critical because the elongation is the locking mechanism for the Flip Lacer. You will see why after you have fully laced the Flip Lacer and have flipped the Flip Lacer into a locked position.
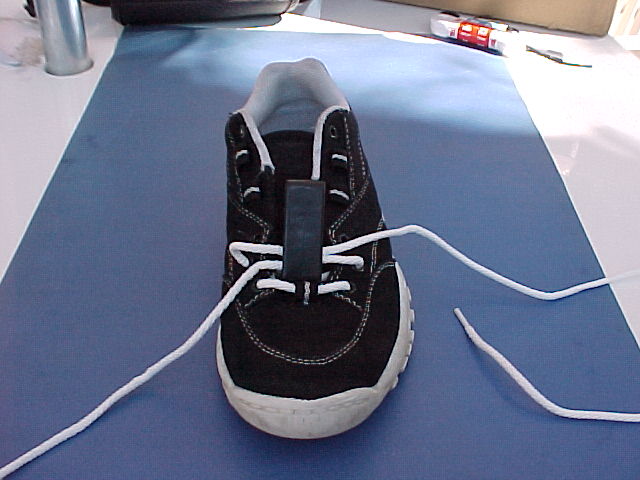
Step 3: Cross lace through the elongated hole of the Flip Lacer. Then continue your standard lacing method as below.
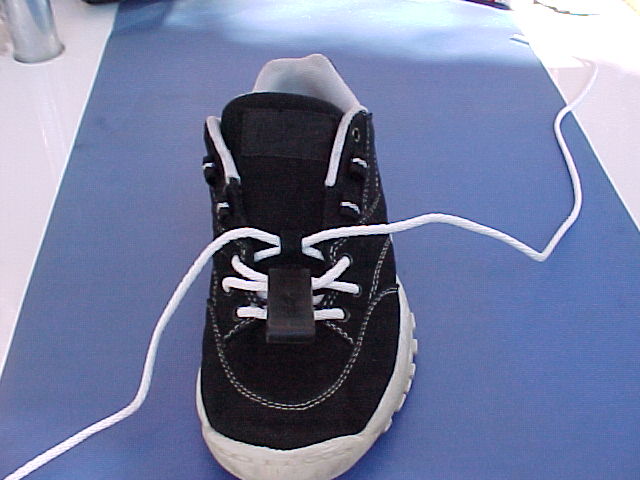
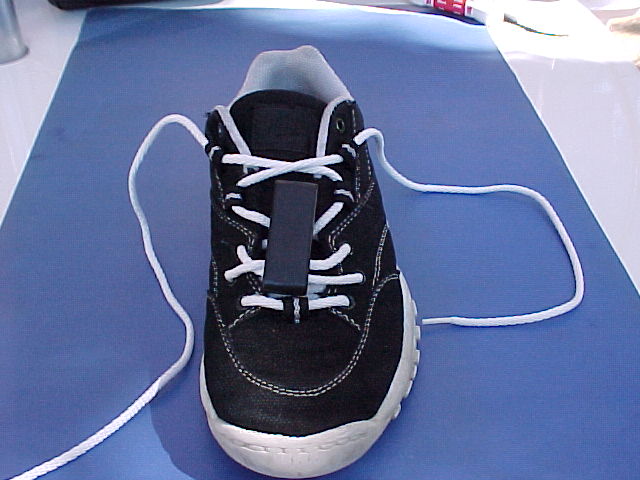
Step 4: Flip the Flip Lacer over and out of your way and start standard cross lacing through eyelets and don't forget the tongue holes of shoe.
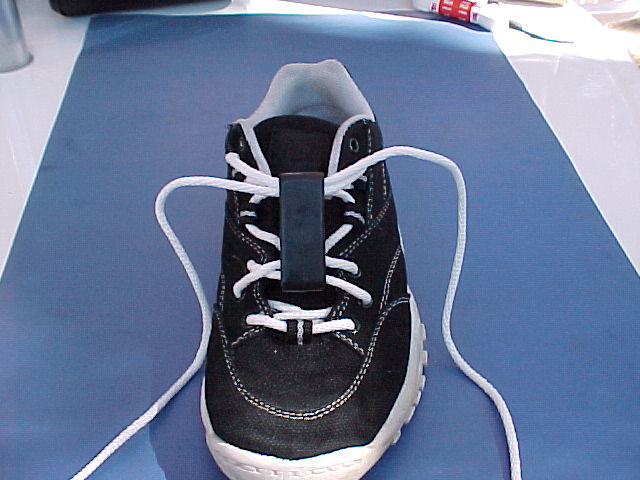
Step 5: Flip the Flip Lacer over and out of your way and start
standard cross lacing through eyelets.
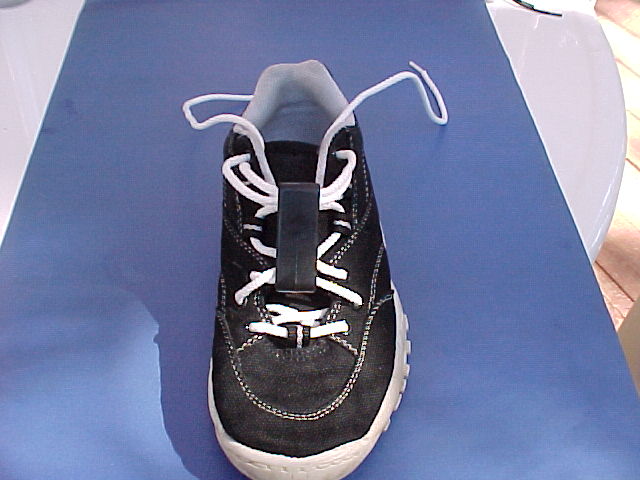
 Step 6: Continue your cross
lacing until you are through the 2nd to the last eyelet hole you
intent to use. Flip the Flip Lacer back up.
Step 6: Continue your cross
lacing until you are through the 2nd to the last eyelet hole you
intent to use. Flip the Flip Lacer back up.
Step 7: Cross lace through small hole of the Flip Lacer. Then go through the last eyelet hole.
Step 8: Lace through the last eyelets. Now you are ready to tie a bow.
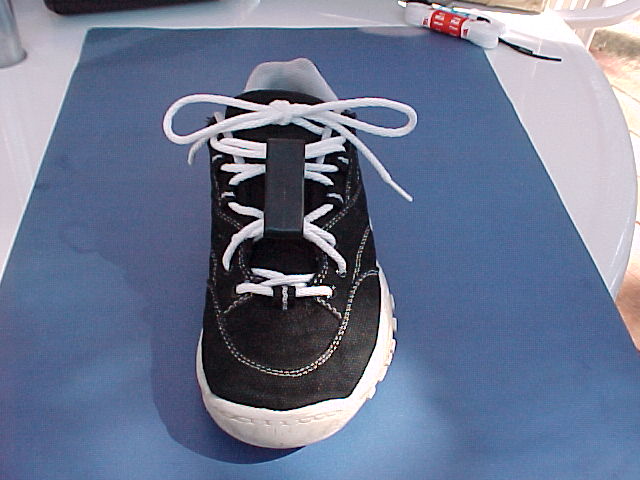
Step 9: Tie your bow with the laces being loose.
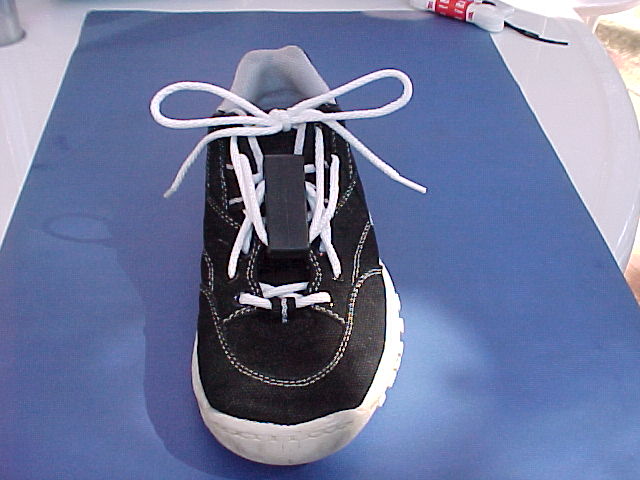
Step 10: Front view of Flip Lacer in a flipped position.
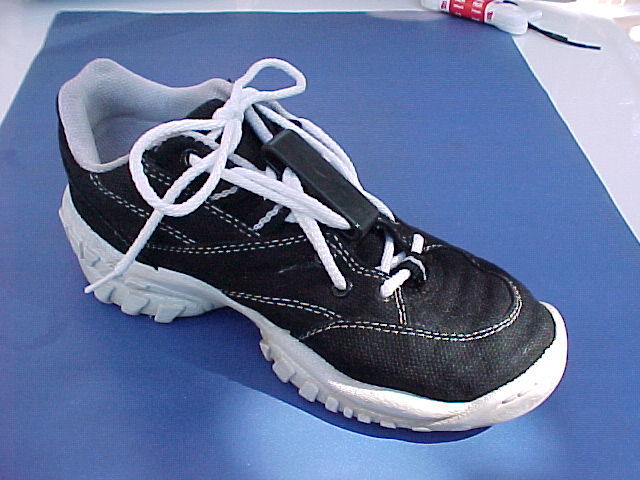
Step 11: Side view of a flipped Flip Lacer. You need to flip the Flip Lacer into a locked position as shown and adjust your bow to a loose setting. You must have your foot inserted into the shoe and the Flip Lacer flipped to the locked position to get your tension adjusted properly. This may require a couple of adjustment and walking till you get your tension properly set for your final bow knot. It important that you be more on the loose side than the tight side. You are doing something that may be new to you and if your laces are to tight, you may suffer discomfort and then blame it on the Flip Lacer. If you are using normal tightness then you shouldn't have any discomfort. Never adjust laces on any shoe so tight that you are cutting off your circulation.
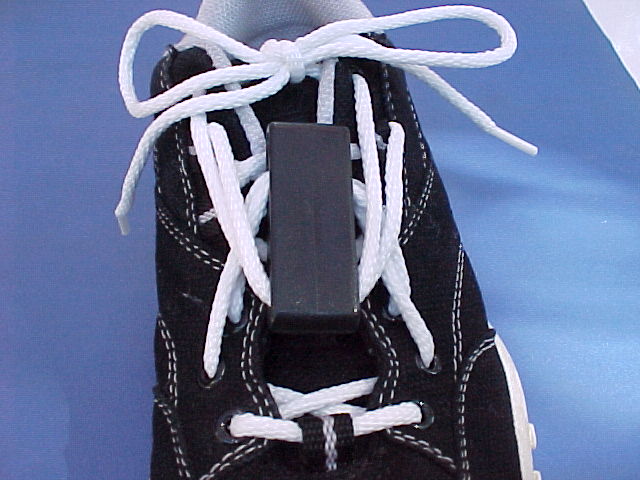
Step 12: Front close-up view of the Flip Lacer.
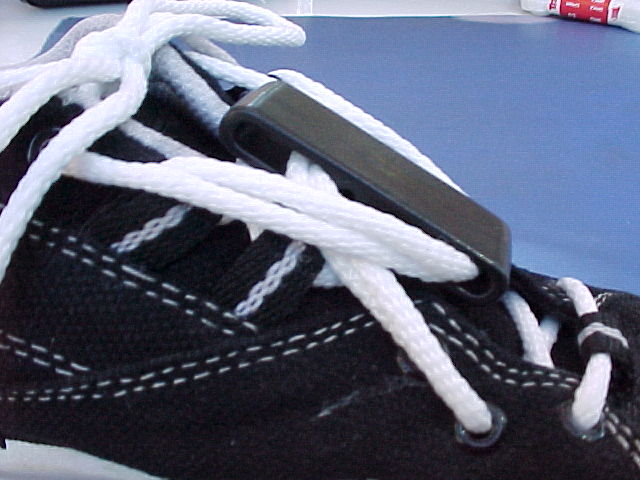
Step 13: Side view close-up. You can that the elongated hole after flipping is now at the top. This overhanging end caused by the elongated hole acts as a lock to keep the flip lacer locked under normal tension. If you allow your shoe to be loose the locking end may not work properly.
Step 14: Close-up of side view of the Flip lacer in a unflipped position.

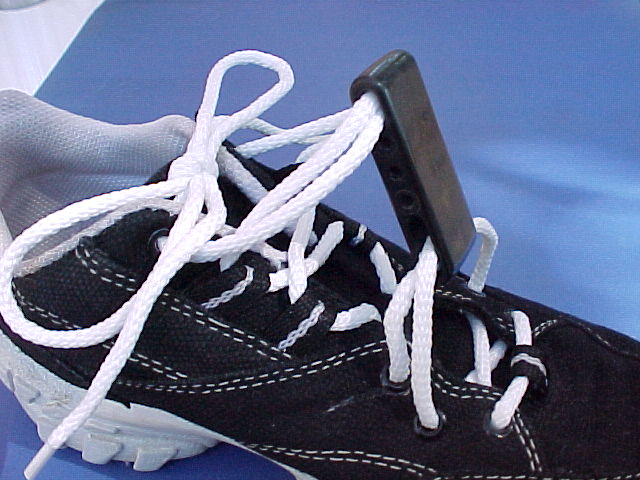
Step 15: Close-up of the Flip Lacer half way through being flipped. This is the most critical part of using the Flip Lacers. When you are ready to flip the Flip Lacer grab the Flip Lacer between your index finger combination middle finger and thumb (the thumb is on one side of Flip Lacer and both the index finger and middle finger on the other side). Now pull hard in a outwards and up direction to pull as much slack of of laces as possible. This will make the flipping part easy. During the flipping process the flip lacer does not contact the shoe. This is where people go wrong. They grab the Flip Lacer at the top and start trying to push or flip it over and jam the Flip Lacer into the top of their foot causing discomfort. When done properly its a quick fluid motion without touching shoe. Its done without thinking. Unflipping is done with the tip of the index finger.
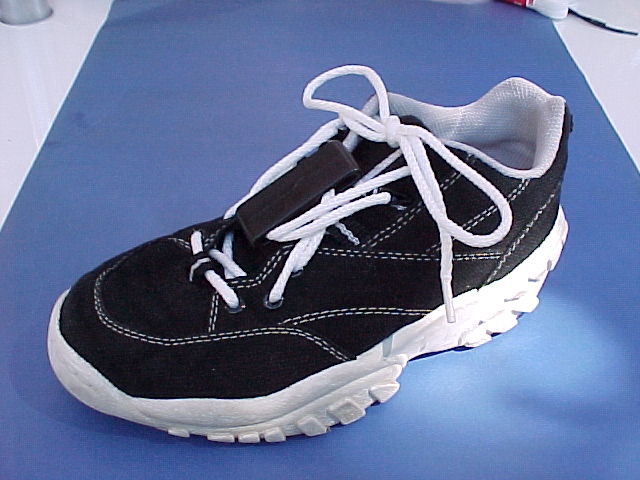
Step 16: Flip Lacer in a flipped position. Wow so easy. I will never routinely tie shoes again!
Thanks for buying Flip Lacers.
Don't give up. If you still can't get it call Bill Shelton at 510-797-6596
or sent me an e-mail. (see below)
Please view Shelton Products other products Home Page
 We
hope you were successful with lacing and using your Flip Lacers.
We
hope you were successful with lacing and using your Flip Lacers.
If any problems please e-mail me at sheltonpro@aol.com We'll leave the E-mail slot open for you.
All products unique trade names are trademarked.
The Flip Lacers are patented. This page created by Bill Shelton
Copyright 1999-2002 Shelton Products All rights reserved